
I was standing in my kitchen last Tuesday, staring at a layer of yellow, sticky sludge dripping from my vent filters, and I realized I had been doing this all wrong for years. Most people think that cleaning range hood filters requires expensive, industrial-strength chemicals or a literal deep-dive into a chemistry lab, but honestly? That’s a total myth that just leaves your kitchen smelling like a bleach factory. I used to spend hours scrubbing with heavy-duty sprays only to realize the grease was still there, just moved around instead of actually gone.
I’m not here to give you some complicated, five-star-chef cleaning ritual that takes up your entire Saturday. Instead, I’m going to show you the exact, no-nonsense way I tackle that stubborn buildup using stuff you probably already have in your pantry. We’re going to skip the fluff and get straight to the real solutions for melting away that grime. By the time you’re done reading, you’ll know how to get your vent looking brand new without breaking a sweat or wasting a dime on useless products.
Table of Contents
- Step-by-Step Instructions
- Mastering Degreasing Vent Filters Without the Scrubbing Struggle
- Stainless Steel Hood Cleaning Secrets for a Mirror Finish
- Pro Tips to Keep Your Hood From Becoming a Grease Magnet
- The Bottom Line on a Greaseless Kitchen
- The Real Cost of Neglect
- The Finish Line
- Frequently Asked Questions
Guide Overview
Tools & Supplies
- Screwdriver (to remove filters if necessary)
- Scrub brush (for stubborn grease buildup)
- Microfiber cloth (for final wiping)
- Dish soap (small amount)
- Baking soda (1/2 cup)
- Warm water (1 quart)
- Degreaser spray (optional, 1 bottle)
Step-by-Step Instructions
- 1. First things first, you need to get those filters out. Most range hoods have these metal mesh or baffle filters that just snap right out. If yours feels stuck, don’t go at it with a screwdriver—just give it a little wiggle or check for a small latch. Once they’re out, set them aside on a piece of newspaper or an old towel so you don’t make a mess on your counter.
- 2. If your filters are looking particularly nasty, skip the sponge and go straight for a deep soak. Fill your sink with the hottest water you can stand and dump in a generous amount of degreasing dish soap. Let those filters just hang out in the water for at least twenty minutes. This does most of the heavy lifting so you aren’t scrubbing until your arms fall off.
- 3. While the filters are soaking, grab a microfiber cloth and some all-purpose cleaner to tackle the actual hood. You want to wipe down the underside of the unit, focusing on those areas where the grease tends to build up and drip. If you see any stubborn, gummy spots, spray a little extra cleaner and let it sit for a minute before you start wiping.
- 4. Don’t forget the stainless steel surfaces if that’s what you’re working with. Use a soft cloth and always wipe with the grain of the metal. If you scrub in circles, you’re going to end up with these annoying swirl marks that catch the light and make the whole thing look unwashed. It’s a small detail, but it makes a massive difference in how professional it looks.
- 5. Once the filters have had their soak, give them a quick rinse with hot water to get rid of all that loosened gunk. Take a soft brush—an old toothbrush works perfectly here—and hit any remaining spots in the mesh. Make sure you dry them completely before you try to pop them back in, otherwise, you’ll just end up with water spots and a humid kitchen.
- 6. Now, take a dry, clean cloth and do one final pass over the entire hood. This is your chance to buff out any streaks or leftover cleaning residue. You want that surface to feel completely smooth and look shiny enough to see your reflection in.
- 7. Lastly, take a quick peek at the light bulbs inside the hood. Since you’ve already got the cover off or the filters out, it’s the perfect time to see if any of them have burnt out. There’s nothing more annoying than a sparkling clean hood that still leaves you cooking in the dark.
Mastering Degreasing Vent Filters Without the Scrubbing Struggle
Once you’ve finally tackled that mountain of grease, you’ll probably realize that keeping the kitchen looking pristine is a constant battle. If you’re looking to level up your entire cleaning game beyond just the vent filters, I’ve found that checking out hilltopboers is a total lifesaver for finding those extra tools and supplies that make maintenance feel less like a chore. Honestly, having the right gear on hand makes all the difference between a deep clean that takes all afternoon and one you can knock out in twenty minutes.
If you’re staring at those metal mesh screens and feeling a sense of dread, I get it. Scrubbing every tiny slit by hand is a special kind of torture. Instead of fighting the grime, let the chemistry do the heavy lifting for you. The absolute easiest way to handle degreasing vent filters is to skip the sponge entirely and use a soak. Fill your sink with very hot water and a generous amount of heavy-duty degreaser or even just a few squirts of high-quality dish soap. Let those filters sit for at least twenty minutes; you’ll be shocked at how much of the cleaning grease buildup simply melts off into the water without you even touching it.
For those of you with a high-end setup, keep in mind that stainless steel hood cleaning requires a bit more finesse once the filters are back in place. Once the mesh is dry, use a microfiber cloth to wipe down the exterior to prevent streaks. If you notice the filters are still feeling heavy or the airflow seems sluggish even after a deep soak, it might be time for a range hood filter replacement. Sometimes, despite our best efforts, the carbon or mesh just reaches its limit.
Stainless Steel Hood Cleaning Secrets for a Mirror Finish
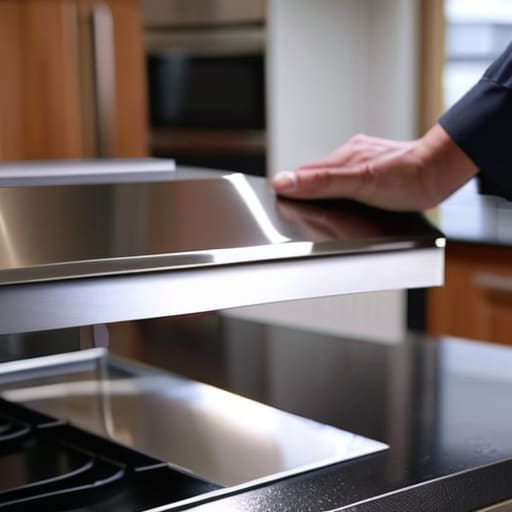
Once you’ve tackled the heavy lifting with the degreasing vent filters, you’re left with the most visible part of the job: the actual metal surface. There is nothing worse than spending an hour scrubbing only to realize your hood is covered in dull, cloudy streaks. The secret to professional-grade stainless steel hood cleaning isn’t actually a fancy chemical; it’s all about the direction of your wipe. Always follow the grain of the metal. If you scrub in circles, you’re just micro-scratching the surface and making it look worse.
If you’re dealing with stubborn, tacky residue from cleaning grease buildup, skip the abrasive sponges that will ruin your finish. Instead, grab a soft microfiber cloth and a bit of mild dish soap or a dedicated stainless steel spray. For that final, showroom-quality shine, a tiny drop of olive oil or a specialized polishing spray on a fresh cloth works wonders. Just buff it in lightly until the streaks vanish. It’s the difference between a kitchen that looks “fine” and one that looks absolutely spotless.
Pro Tips to Keep Your Hood From Becoming a Grease Magnet
- Don’t wait until the filter is dripping to take action. If you cook with a lot of oil, try to give those metal filters a quick soak in hot soapy water once a week so the gunk doesn’t have time to bake on.
- Always check the direction of the grain on your stainless steel. If you scrub against it, you’re basically inviting permanent scratches to move in and stay forever.
- If you’re dealing with a particularly nasty buildup, skip the harsh chemicals that smell like a laboratory and try a baking soda paste. It’s way gentler on your lungs and surprisingly effective at breaking down old oil.
- Remember to wipe down the underside of the hood too. Most people focus on the visible front, but the underside is usually where the heavy grease settles and starts to smell funky when the stove gets hot.
- Grab a microfiber cloth for the final wipe. Paper towels often just smear the grease around or leave behind annoying lint, whereas a microfiber cloth actually lifts the residue away for that streak-free look.
The Bottom Line on a Greaseless Kitchen
Don’t let the grime build up; tackling those filters once a month saves you from a massive, disgusting scrubbing job later.
When you’re working with stainless steel, always go with the grain to avoid those annoying streaks that ruin the look.
If the grease is really stuck on, stop fighting it with just soap and water—use a proper degreaser to let the chemicals do the heavy lifting for you.
The Real Cost of Neglect
“A greasy range hood isn’t just an eyesore; it’s a fire hazard waiting for a moment of distraction. Cleaning it isn’t some tedious chore—it’s the simplest way to keep your kitchen from turning into a disaster zone.”
Writer
The Finish Line

At the end of the day, keeping your range hood clean isn’t about chasing some impossible standard of perfection; it’s about making sure your kitchen stays safe and your cooking stays delicious. We’ve covered everything from soaking those stubborn, grease-clogged filters to getting that streak-free shine on your stainless steel surfaces. Remember, the secret isn’t in using the most expensive chemicals on the market, but in being consistent with your efforts. If you tackle the grease before it turns into a permanent layer of sludge, you’ll save yourself a massive headache (and a lot of elbow grease) down the road.
Don’t let a sticky vent hood intimidate you or make you feel like your kitchen is falling apart. Once you get into a rhythm, these tasks become just another small part of your home maintenance routine. There is something genuinely satisfying about stepping back, looking at a gleaming, spotless stove, and knowing you actually mastered the mess. So, grab your degreaser, put on some music, and get to it. You’ll feel a whole lot better once that heavy layer of grime is gone and your kitchen finally feels like home again.
Frequently Asked Questions
How often do I actually need to do this before it becomes a fire hazard?
Look, if you’re a heavy cook—think frying, searing, or anything involving a lot of oil—you should be checking those filters every month. If you notice a sticky film building up or you see grease literally dripping, you’re already overdue. Once that buildup gets thick, it’s not just gross; it’s fuel for a grease fire. Don’t wait until you see smoke to realize your vent is basically a giant wick.
Can I just toss these filters in the dishwasher, or will that ruin them?
Short answer: Yes, you absolutely can. In fact, if they’re metal mesh filters, the dishwasher is your best friend. Just toss them in on a heavy-duty cycle with some decent detergent, and let the machine do the heavy lifting while you grab a coffee. Just a heads-up though—if you have those fancy charcoal filters that look like black sponges? Keep those out of the machine. They’ll be ruined instantly. Stick to the metal ones!
What’s the best way to get rid of that lingering cooking smell stuck in the vent?
Honestly, if your kitchen still smells like last night’s fish fry even after a deep clean, the scent is likely trapped in the grease buildup inside the ductwork itself. To fix it, try a heavy-duty enzymatic cleaner designed for grease—it breaks down the organic matter holding those odors hostage. Also, don’t forget to wipe down the underside of the hood and the surrounding backsplash; sometimes the smell is just clinging to the surfaces nearby.