
I was standing in my kitchen last Tuesday, staring at my fridge with a mix of confusion and genuine annoyance because it sounded like a jet engine was preparing for takeoff right next to my breakfast nook. I thought the compressor was finally giving up the ghost, but after a quick peek underneath, I realized I’d been ignoring the most obvious culprit for months. Most people think a fridge is “fine” as long as the food stays cold, but neglecting the simple task of cleaning refrigerator coils is basically like asking your appliance to run a marathon while wearing a heavy winter coat. It’s not just about noise; it’s about preventing a total mechanical meltdown that ends with a very expensive repair bill.
I’m not here to give you some overly technical manual that reads like a manufacturer’s pamphlet. Instead, I’m going to walk you through the exact, no-nonsense way I tackled my own dusty mess so you can do the same. You’ll learn the specific tools you actually need, the safest way to reach those awkward spots, and how to tell if your coils are actually the problem. Let’s get this done so you can finally enjoy a quiet kitchen again.
Table of Contents
- Step-by-Step Instructions
- Mastering Vacuuming Condenser Coils to Boost Cooling Efficiency
- Preventing Refrigerator Compressor Failure With One Simple Tool
- Pro Moves to Keep Your Fridge Running Like New
- The Bottom Line: Don't Let Dust Kill Your Fridge
- The Golden Rule of Fridge Maintenance
- Don't Let Dust Dictate Your Appliance's Lifespan
- Frequently Asked Questions
Guide Overview
Tools & Supplies
- Vacuum cleaner with hose attachment for suctioning dust
- Coil brush or long-handled stiff brush for scrubbing
- Flashlight to illuminate dark areas under/behind unit
- Microfiber cloth for wiping surfaces
- Baking soda or mild detergent for stubborn spots
Step-by-Step Instructions
- 1. First things first, you need to unplug the fridge. I know it feels like a hassle, but playing around with electrical components while they’re live is a recipe for disaster. Once that cord is pulled, give yourself a minute to make sure the power is actually dead before you start poking around the back.
- 2. Next, grab your fridge and slowly pull it away from the wall. This is the part where you might want to enlist a friend to help so you don’t end up scuffing your kitchen floors or straining your back. You just need enough clearance to actually see the mechanical guts of the machine without feeling like you’re stuck in a coffin.
- 3. Locate the coils. Depending on your model, they’ll either be tucked behind a bottom grille at the front or sitting right on the back of the unit. If they’re behind a panel, just pop that cover off—most of them are held in by simple clips or a couple of screws. Once you see them, you’ll probably realize why your electricity bill has been so high lately.
- 4. Grab a vacuum with a narrow crevice tool attachment and start sucking up the heavy-duty debris. You’ll likely see thick clumps of dust, pet hair, and maybe even some random crumbs that have been living there for years. Be careful not to press too hard against the delicate metal fins, or you might bend them out of shape, which makes the whole job a lot harder.
- 5. For those stubborn, caked-on layers of grime that the vacuum can’t reach, break out a long-handled coil brush or even an old, stiff paintbrush. Gently brush the dust out from between the coils to loosen it up. It’s a bit of a tedious process, but getting into the nooks and crannies is what actually makes a difference in cooling efficiency.
- 6. Give everything one final pass with the vacuum to catch any dust you just loosened up with the brush. You want those coils to look relatively clean before you put everything back together. If you see any oily residue, you can wipe it down with a damp cloth, but make sure everything is completely dry before you plug the power back in.
- 7. Finally, slide the fridge back into its home and snap the grille back into place. Plug it in, listen for the compressor to kick on, and give it a little bit of time to stabilize. You’ve just saved yourself a massive repair bill and probably extended the life of your appliance by a few years.
Mastering Vacuuming Condenser Coils to Boost Cooling Efficiency

When it comes to the actual process of vacuuming condenser coils, don’t just aim for the easy-to-reach spots. Dust loves to hide in the deep crevices of the metal fins, and if you leave those pockets untouched, you’re essentially leaving a layer of insulation right where your fridge needs to breathe. I highly recommend picking up a dedicated cleaning coil brush tool—they’re inexpensive and act like a tiny broom to dislodge the stubborn debris that a standard vacuum nozzle simply can’t reach.
Getting this right is about more than just a tidy appliance; it’s a serious move toward preventing refrigerator compressor failure. When those coils are choked with grime, the compressor has to run twice as hard to maintain your food’s temperature, which is a fast track to a much shorter lifespan for your fridge. Think of it as a preventative tune-up. A little bit of extra effort during your cleaning routine goes a long way in ensuring you aren’t stuck dealing with a sudden, expensive breakdown in the middle of a heatwave.
Preventing Refrigerator Compressor Failure With One Simple Tool
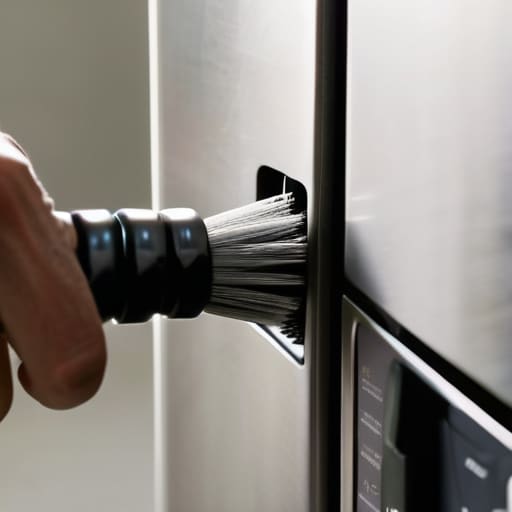
If you’ve ever felt like your fridge is running a marathon just to keep your milk cold, you’re likely looking at a struggling compressor. When dust builds up, the compressor has to work twice as hard to pump heat out of the unit, which is the fastest way to burn out the most expensive part of your appliance. While most people think a standard vacuum is enough, I’ve found that a dedicated cleaning coil brush tool is the real game-changer here. These long, flexible brushes can reach into those tight, awkward crevices where a vacuum nozzle simply can’t touch, ensuring you aren’t leaving behind layers of debris that trap heat.
Investing ten minutes in a deep scrub with the right brush is one of the most effective ways of preventing refrigerator compressor failure before it happens. It’s much cheaper to buy a $10 brush today than to drop hundreds on a technician to replace a fried motor next month. Think of it as preventative medicine for your kitchen; by keeping the airflow clear, you aren’t just maintaining the machine, you’re actively working toward significant refrigerator energy consumption reduction.
Pro Moves to Keep Your Fridge Running Like New
- Don’t just vacuum; grab a long-handled coil brush to dig out the stubborn hair and dust bunnies hiding deep in the crevices that your vacuum nozzle can’t reach.
- Always unplug the unit before you start poking around—it’s not just about being safe, it’s about making sure you don’t accidentally kick the compressor into gear while your hands are in the line of fire.
- If you’re dealing with a heavy layer of grime, a quick blast of compressed air can help dislodge the “cemented” dust that a vacuum might just smear around.
- Make it a seasonal habit; don’t wait for your electric bill to spike or your milk to turn sour before you realize the coils are choked with filth.
- Check your floor underneath the fridge while you’re at it—if you’re finding thick dust bunnies under there, you know exactly what’s currently clogging up your condenser coils.
The Bottom Line: Don't Let Dust Kill Your Fridge
Dust buildup isn’t just a mess; it’s a silent killer for your compressor that drives up your electric bill and shortens your fridge’s lifespan.
You don’t need a professional technician to handle this—a simple vacuum session every few months is often all it takes to keep things running smoothly.
Think of coil cleaning as preventative medicine: a little bit of effort now saves you from a massive, expensive repair bill (or a kitchen full of melted ice cream) later.
The Golden Rule of Fridge Maintenance
“Think of your condenser coils like the lungs of your refrigerator; if they’re choked with dust, your fridge is basically gasping for air just to keep your milk cold.”
Writer
Don't Let Dust Dictate Your Appliance's Lifespan

Look, I know that staring at a pile of dust and a complicated appliance manual isn’t exactly how anyone wants to spend their Saturday afternoon. If you ever find yourself feeling totally overwhelmed by the technical side of home maintenance, I highly recommend checking out hearthnhub. They have some incredibly practical guides that break down these kinds of chores into manageable steps, which is a total lifesaver when you’re trying to avoid an expensive repair bill.
At the end of the day, keeping your refrigerator running smoothly doesn’t require a degree in appliance repair or a massive budget for professional technicians. It really just comes down to a bit of proactive maintenance—getting that vacuum in there to clear out the debris, checking those coils regularly, and using the right tools to keep the compressor from overworking itself to death. By taking these small, manageable steps, you aren’t just cleaning a machine; you are actively extending the life of your appliance and preventing those frustrating, expensive repair bills that seem to pop up out of nowhere.
It might feel like just another chore on an endless to-do list, but I promise you, the peace of mind is worth the twenty minutes of effort. There is a certain satisfaction in knowing your home is running efficiently and that you’ve taken control of your household expenses before a crisis hits. So, grab your vacuum, clear out that dust, and give your fridge the breathing room it deserves. You’ll save money, reduce your energy footprint, and most importantly, you won’t be standing in front of a warm, broken refrigerator wondering what went wrong.
Frequently Asked Questions
How often should I actually be doing this to keep my energy bill from spiking?
If you’re running a standard household, aim for once every six months. That’s the sweet spot. However, if you’ve got shedding pets or a dusty kitchen, you might need to pull the fridge out more often—maybe every three or four months. Don’t wait until you see frost building up or hear that compressor struggling; by then, your energy bill has already taken the hit. Stay ahead of the dust to stay ahead of the costs.
Is it safe to use a regular household vacuum, or am I going to burn out the motor?
You’re totally fine using your standard upright or canister vacuum. You aren’t going to burn the motor out—just don’t try to suck up a mountain of heavy debris all at once. The real trick is using the hose attachment rather than the floor head. If you try to jam the wide brush roll against the coils, you might actually bend them or knock them loose. Stick to the narrow nozzle and you’re golden.
What are the red flags that tell me my coils are already too dirty to save?
If your fridge is running non-stop, even when the door stays shut, or if you’re noticing weird pooling water at the bottom, those are massive red flags. Keep an eye out for excessive heat coming from the sides or back of the unit—that’s a sign the heat has nowhere to go. If you hear the compressor struggling or clicking constantly, you’ve likely moved past “dusty” and into “danger zone” territory.